Using Microsoft Apps as a backend
A guide on how to integrate with the Microsoft Graph.
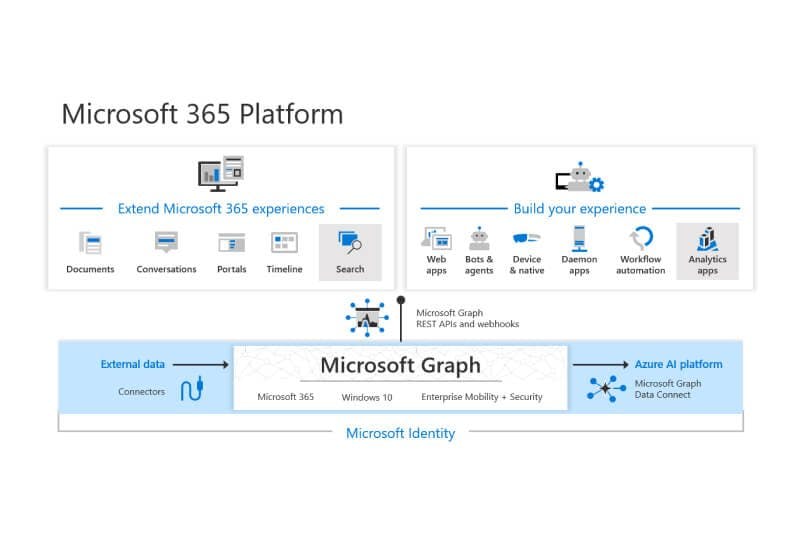
The Microsoft suite of applications has grown over the years from Office to almost anything related to work. Most of those applications are "programmable" in one way or another, and partners in the company's ecosystem use the available tools and frameworks to customize them for their clients. However, Microsoft realized back in 2015 that they needed a unified approach, a universal API to enable the development of new software that can combine all the data available across Microsoft applications to solve new problems and offer unique user experiences. And this is how Microsoft Graph was born.
Although everything started from Office, now it exposes the full suite of applications, including Sharepoint and Dynamics. And apart from obviously reading data, you can also modify them. There is an overview page that gets into more detail.
In this post, you will see how you can connect to the Microsoft Graph and, as an example, retrieve your Sharepoint lists. You will use the Allcancode platform to create a web application and generate code for the React framework. Finally, you will test the application using the preview capabilities of the platform.
Create the web app
If you don't have an account already, it is easy to create a free one. It is also a good idea to go through the onboarding/tutorial embedded in our platform so that you can follow the concepts and structures presented here.
There is a public application named "MicrosoftAuth" , which I will explain in this post. Feel free to duplicate it to start building your own application based on that, and of course put you own IDs so that it authenticates with your Active Directory.
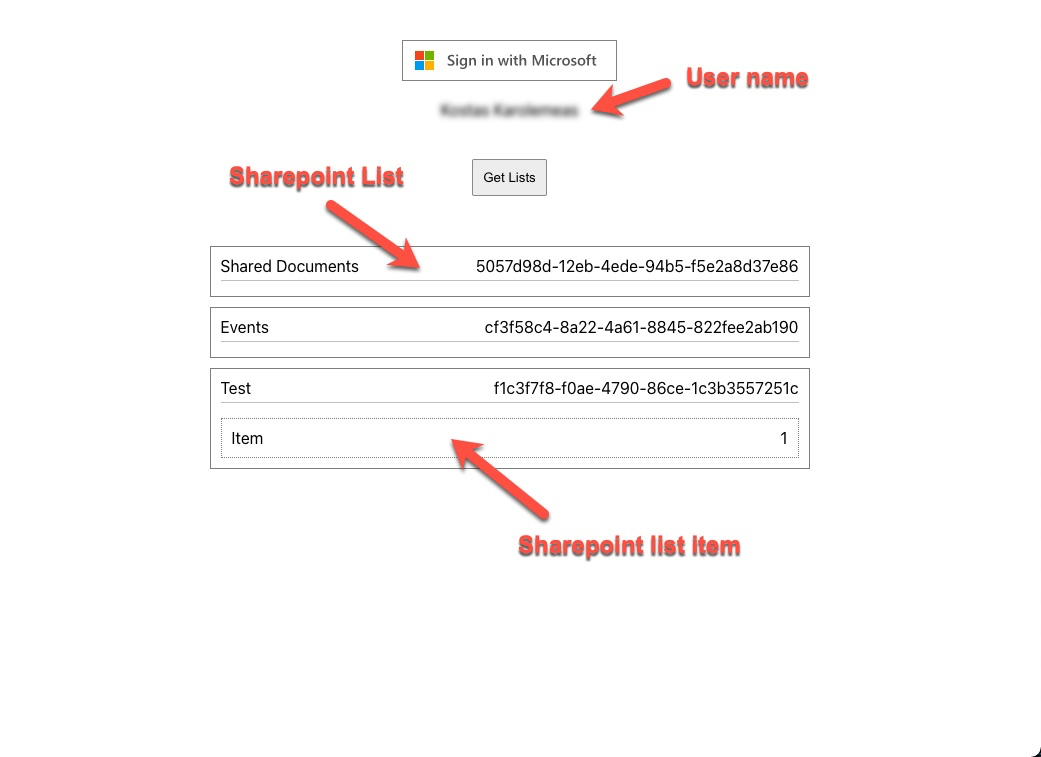
This how this simple application looks like. A button for logging in, a text box beneath to show the logged in user's name and a button that retrieves all the lists of the root Sharepoint site to which the user has access. If the user click on a list, its box will expand to show the list items. In this case, we assume that the list has an "id" and a field "name" and in the screenshot below I have clicked on the "Test" list to retrieve the one item that it contains.
The layout is minimal as the purpose of this is to demonstrate the logic. The actual interfacing with Microsoft Graph is performed by a component named "MsGraph (Microsoft Graph)", which is part of the default Allcancode library and its React code is available in the platform. Internally, it uses the Javascript edition of the Microsoft Authentication Library. By the way, you can create your own framework-native components as explained in a separate post.
The "Home" page
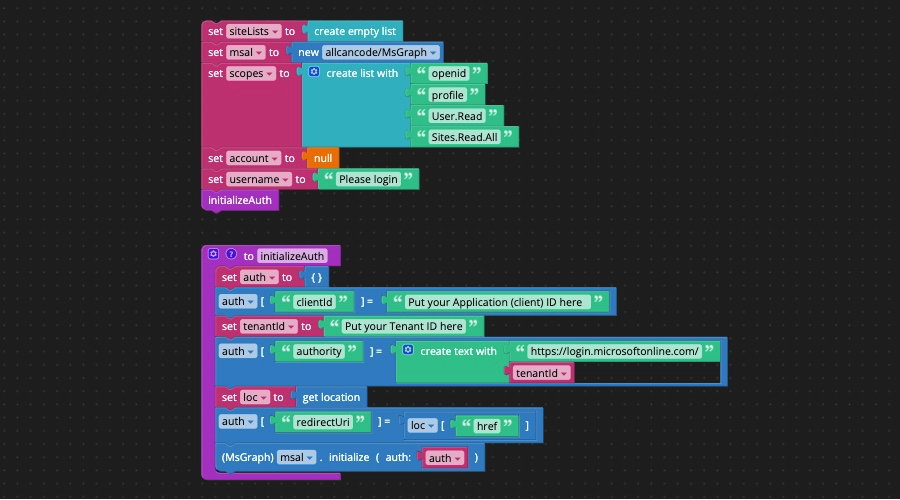
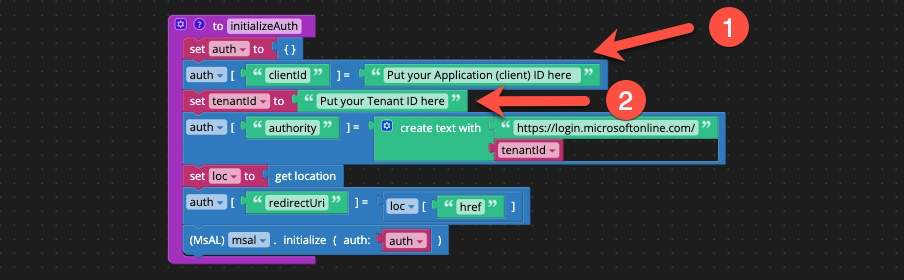
This is where you will find most of the logic. The first step is to initialize the list (array) that will hold the Sharepoint lists. Then create an instance of the "MsGraph" component and create a list of the scopes which define the required permissions to ask from the end-user. Permissions depend on the query (what we want to read, what we want to update) and the best way to explore the graph and also identify the scopes is to use the Graph Explorer. Finally we call the "initializeAuth" function that initializes the component by providing the required IDs. The next section explains where you will find them. The "get location" block retrieves the "location" object provided by the browser, which contains among other things the current Uri of our page ("href").
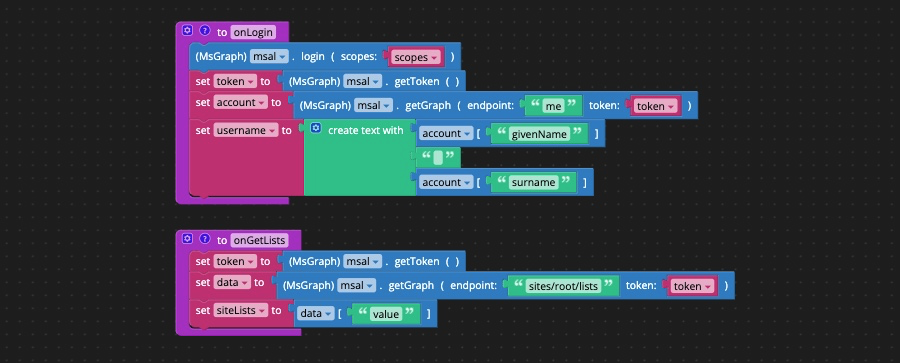
The login is done with a single block and requires the list of scopes. Once successfully logged-in you can perform any query to the Microsoft Graph provided that you first get a valid token. The token practically add your identity to the query for authorization purposes. The "onLogin" function also retrieves the user's profile so that we can display its name. The "onGetLists" function retrieves the lists available in the root Sharepoint site. You will find the endpoint or path to the data you want to access and the structure of the corresponding response in the Graph Explorer mentioned earlier.
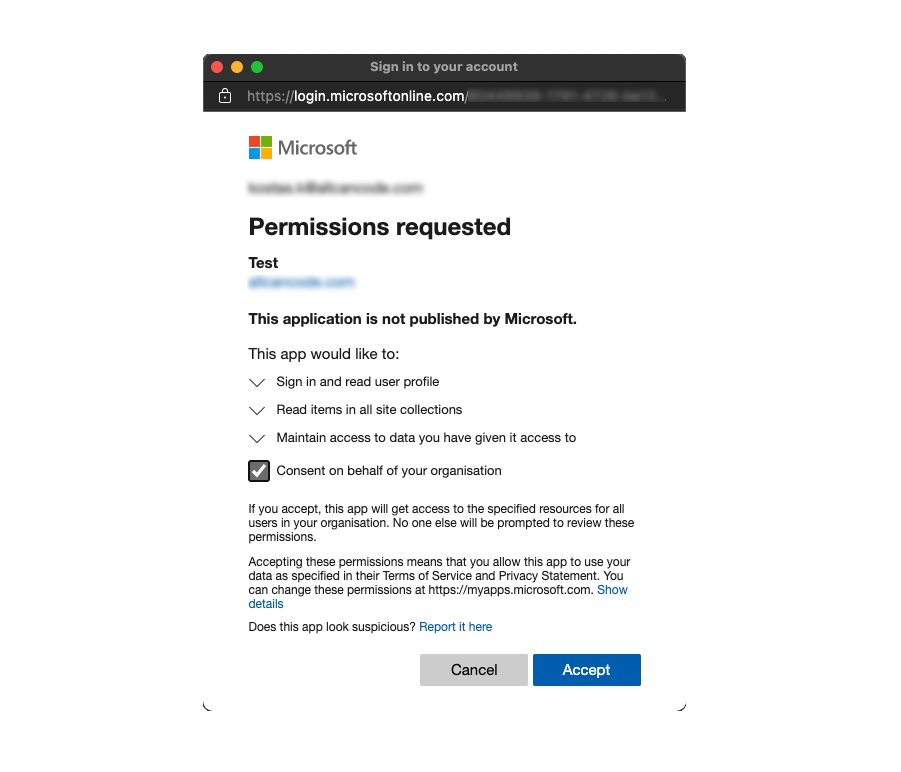
And this how the pop-up asking for the required permissions will look like after a successful login:
The "SiteList" component
For each Sharepoint list, a "SiteList" component instance will be created by the list container. Clicking on it will retrieve the items of the list from Sharepoint. Again we need to instantiate the "MsGraph" component and form the graph endpoint by adding the id of the list. The "native get" block accesses properties passed to the component from its parent which in this case is the list container.

Register the app in your Active Directory
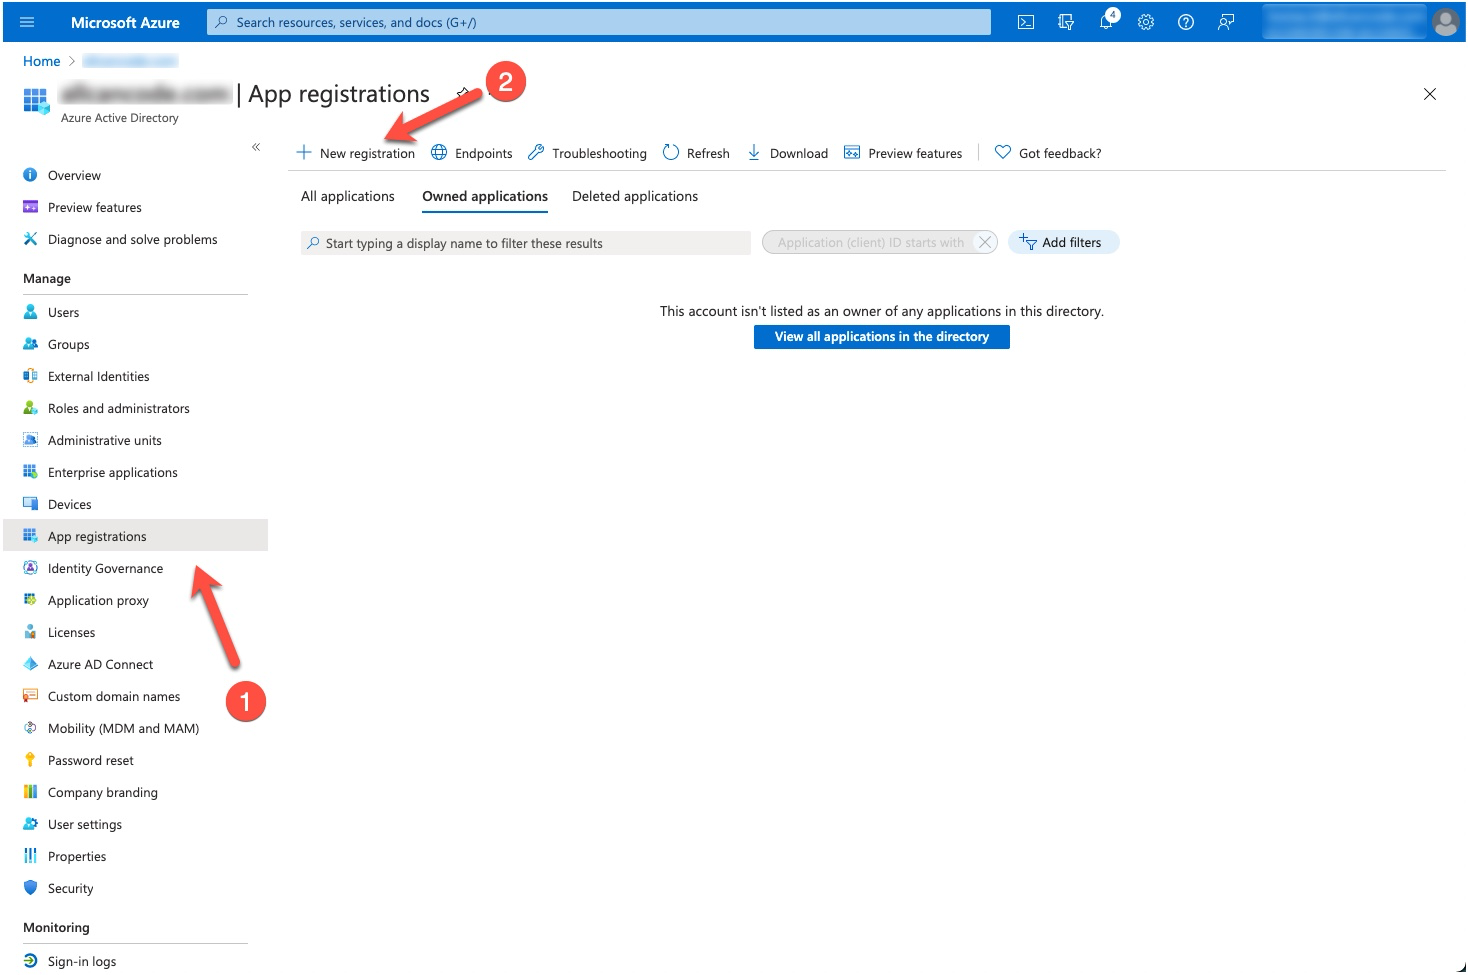
Sign in to the Azure portal and go to the Active Directory of your organization. If you don't have administrative rights or no access to the portal at all, then you will need to send the link of this post to the Azure administrator of your IT department. If it is going to be a public application, then consider creating a new tenant of type Azure Active Directory (B2C).
Click on "App registrations" and then on "+ New registration".
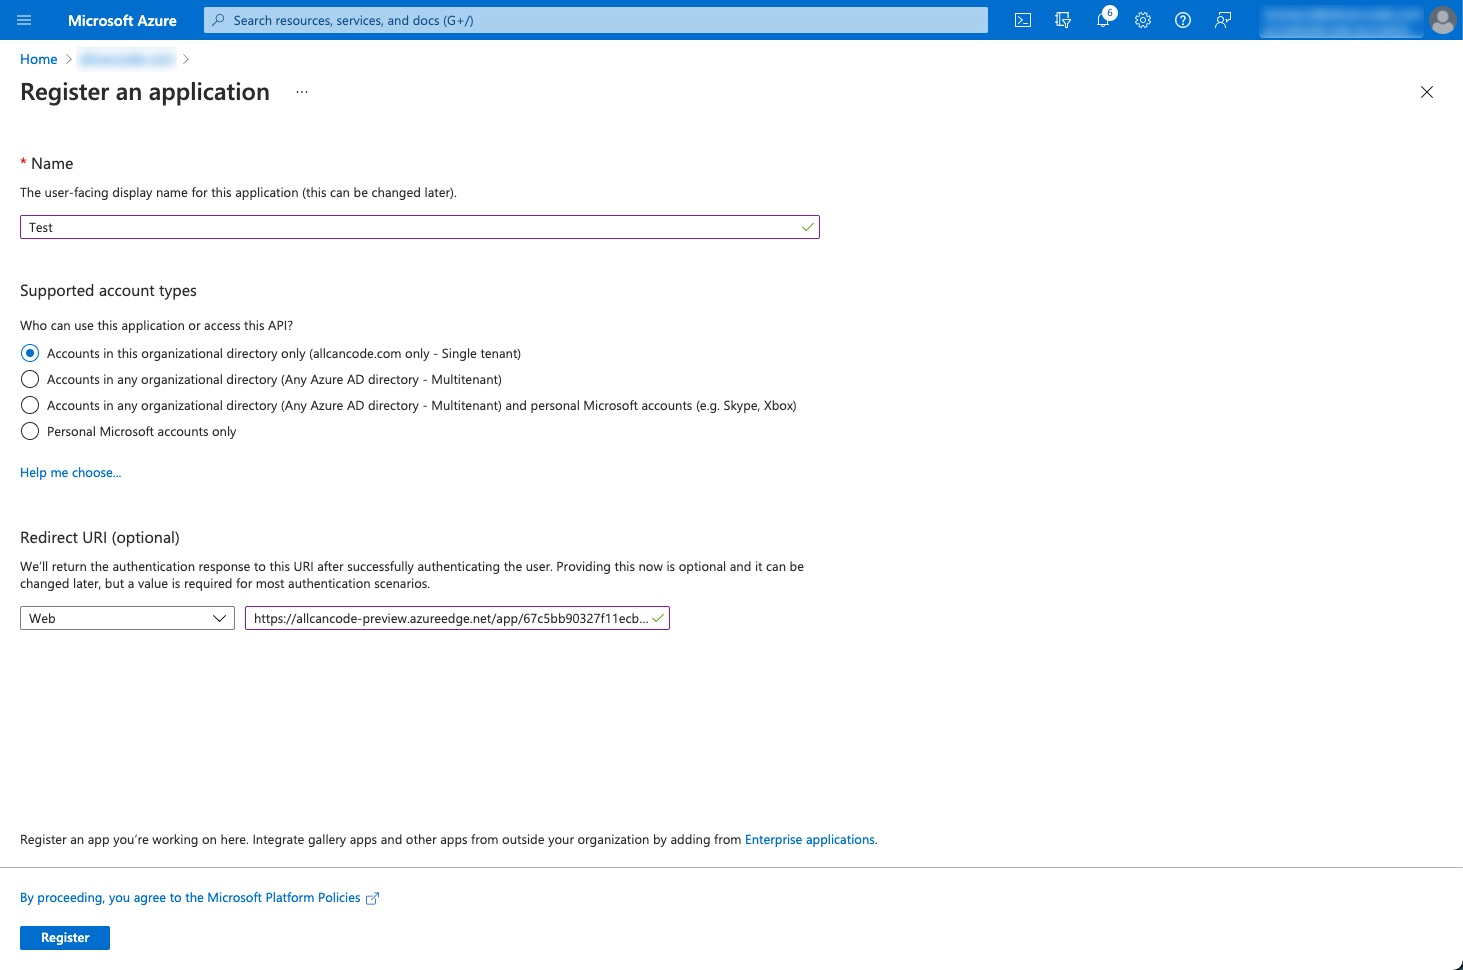
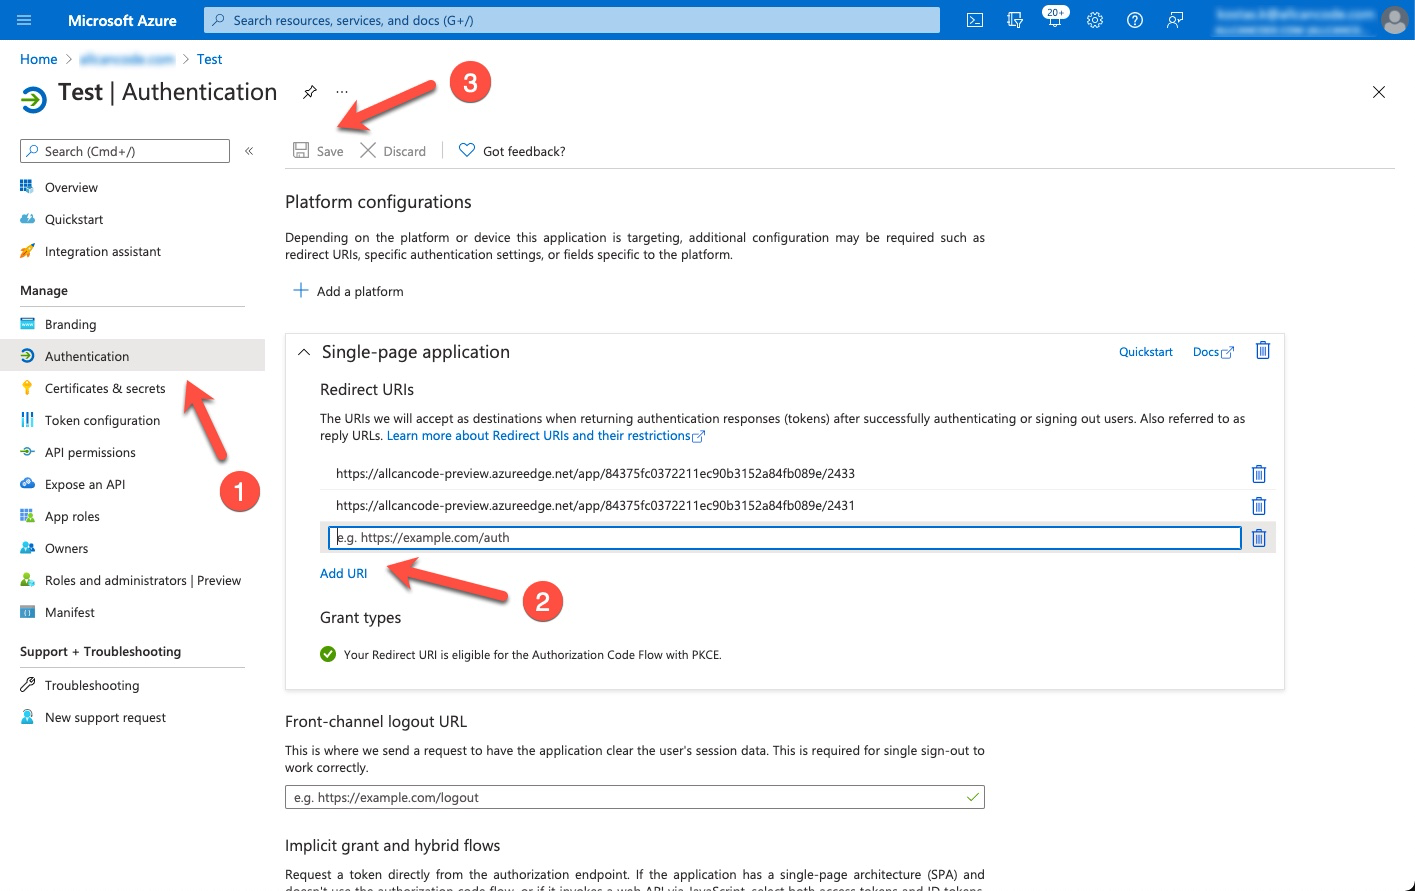
This is going to be a Single-page application or SPA and let's assume that you prefer to limit its access to users in your organization. Of course you can change that in the "Account type" section of the following page. For the "Redirect URI" type in the preview url of your app that you generated in the previous section.
Once the registration completes, open it to get the Application (client) ID and the Directory (tenant) ID.
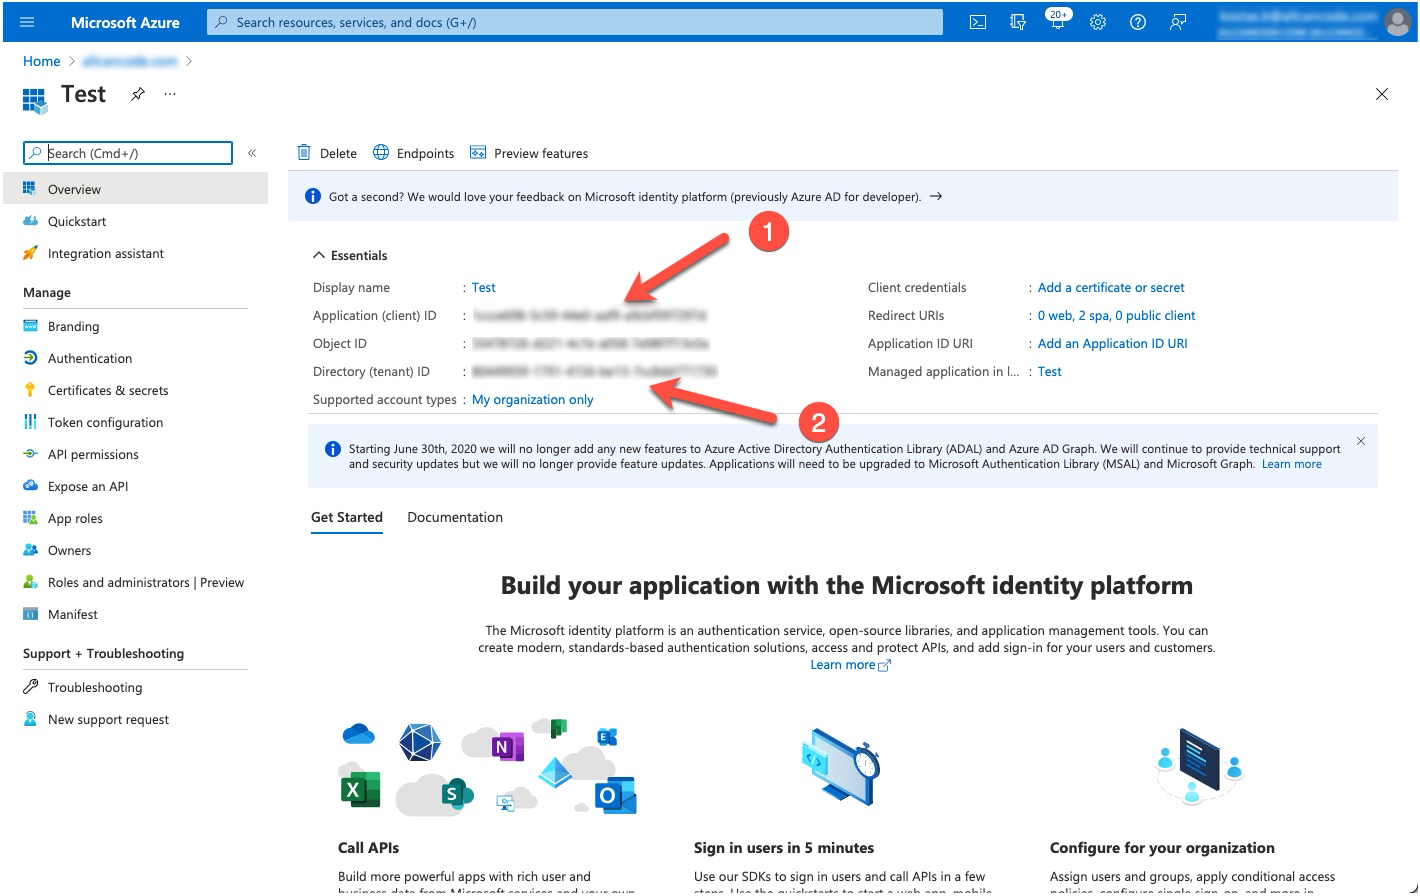
Then copy and paste them in the code of your Home page for the variables "clientId" and "tenantId" respectively.
That's it! Now you can build and preview your application. In this case you need the "raw" URI of the preview, which you can copy to clipboard from the context menu of your build.
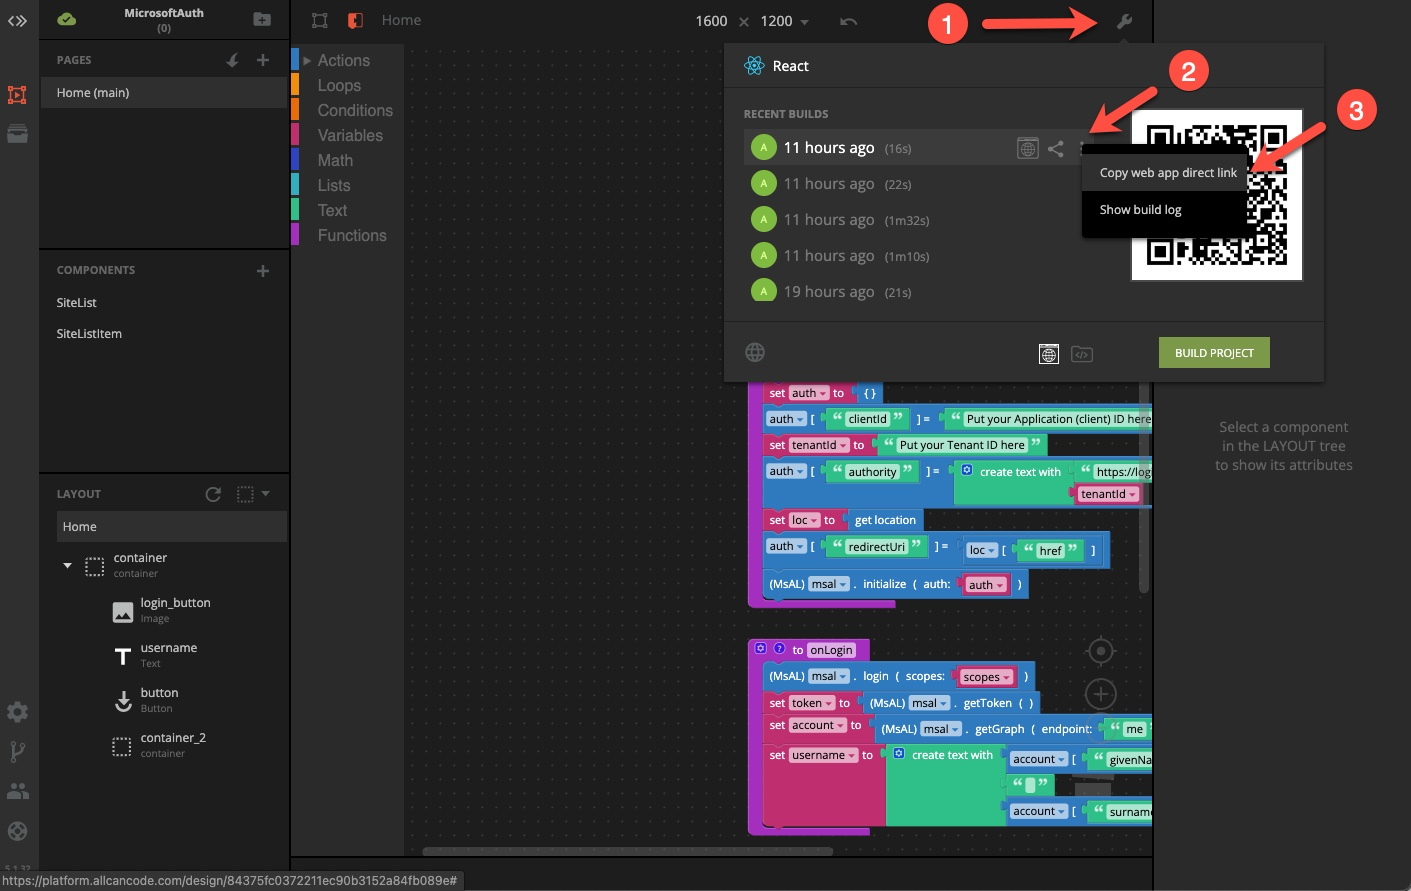
One last thing to know is that each time you create a new build, a new URI will be generated. This is on purpose so that you can access any of your builds at any time. However in this particular application the URI needs to be known to Azure Active Directory. So every time you build, don't forget to add the new URI to the "Authentication" section of your registered application and click on "Save".
Finally, the Allcancode team is always available to help you integrate with Microsoft Graph or any other backend technology and it is very easy to reach out to us through our online community or by posting a support ticket from within the platform based on the support services level that you are in.